Southern Living - Red Wine Sippin' - Wife - Mom of 3 - Jesus Follower- Mompreneur
DIY “EAT” Letters
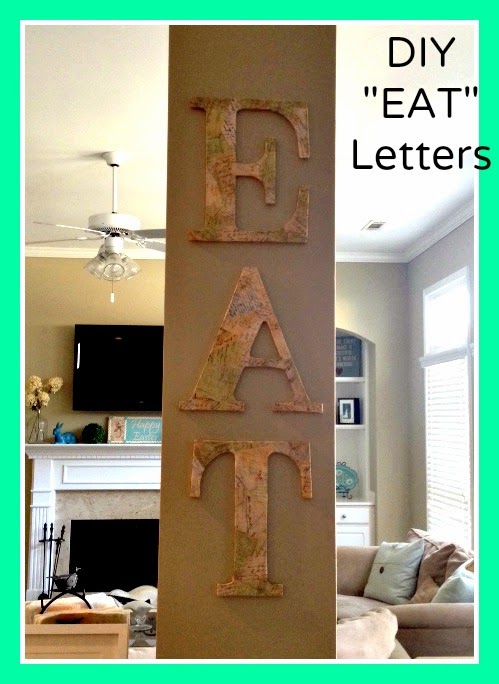
I wanted to share with you all today my latest DIY project. I have been wanting “EAT” letters for kitchen for a while now but had not seen any to purchase that would fit the space where I was wanting to put them: i.e. a column in my kitchen. So when I had the idea to make my own I figured why not try? They turned out to be pretty easy to make and relatively inexpensive and I LOVE the finished result.
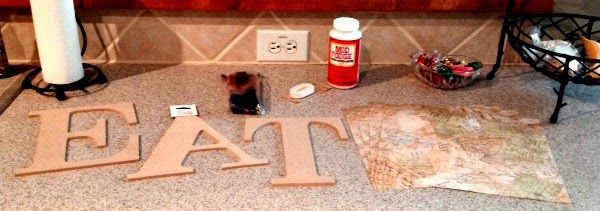
To make your own “EAT” letters are you need is the items shown in the picture below which include: cardboard letters E, A, & T (I bought these at Hobby Lobby for $2.50 a piece), Mod Podge, sponge brush, and scrapbook paper (I decided on this pretty postcard paper I found at Hobby Lobby and purchased 4 sheets although I didn’t even end up using 2 of the sheets).
All I did was cut strips and pieces of the scrapbook paper and used Mod Podge to glue it on to the letters. I then went over each letter with an extra coat of Mod Podge to keep it all intact and make it look pretty. The project took me less than an hour and cost me less than $10!
These are really cool! I've seen these super expensive in stores, but I think I may just make them myself. Thanks for the DIY! Oh, and I'm also an Atlanta blogger. It's nice to "meet" you!
I just used the double sided sticky foam tape you can purchase at any craft store (you can see it is the white rolled up foam in the first picture) and used it to apply it directly to the wall.


These are really cool! I've seen these super expensive in stores, but I think I may just make them myself. Thanks for the DIY! Oh, and I'm also an Atlanta blogger. It's nice to "meet" you!
I so want to make these, and I was just at Michaels today. I would love for you to share on my Chic By You Link Party @ http://chicbytab.blogspot.ca/2014/04/chic-by-you-wednesday-link-party-6.html. Hope to see you there!
I will be glad to share! Linking up now! 🙂
I know…me too! I thought this was a neat, inexpensive alternative!
And nice to "meet" you as well! Always fun to meet another Atlanta blogger!
Nice. I love letters. I have letters ready to go on my mantel but don't know how to affix them to the wall.
I used the double sided sticky tape to put mine up that you can get at any craft store.
How did you affix the letters to the sign?
I just used the double sided sticky foam tape you can purchase at any craft store (you can see it is the white rolled up foam in the first picture) and used it to apply it directly to the wall.
What a cute idea! I like having quotes up in the house…this would be fun too! Visiting from LOBS!
Thanks!
These are so fun and pretty! Would love for you to share at Fridays Unfolded!
Alison
Nancherrow
Thank you! I will go share now. 🙂
I love this Chelsea! I have always liked the eat signs!
Thanks, Mindi! Me too! That's why I decided to make my own! lol 🙂
These turned out so great! Thanks for showing how to make these, they look fantastic in your space.
Thank you!